Archive for the ‘frugal gardener’ Category

Creatures In My Garden

 Two Worlds Collide

With one exception, I encourage critters in my garden. Creeping, jumping, slithering or flying — they are all welcomed!

You see, I am the intruder into their world where life, wonder, grace, purpose and  beauty abound.   Sure, there is struggle, even fierce conflict and death, but not senseless destruction, we humans accept as part of ours.

Yes, I experience conflicting emotions.   From youth my thinking has been guided toward  “If it is small, exceptionally large, or extraordinary, destroy it.”

IMG_0101The rationalization is this annihilation is done in the name of science ( study it), our protection and preservation (it might do harm ),  maybe boastful pride ( a trophy).

In my garden, I can be different.  There is no need to destroy simply because it is here;  the beauty of co-existence brings appreciation for the little things.    There is no need for two worlds to collide.

Frugal Gardener-Could Worms Be The Answer?

Costs continue to spiral.   Attempts  to  become  more self sustaining  are , well,  discouraging.

Grow my own.  I need land!  I need seeds!  I need fertilizer!

I NEED HELP!

I have experimented with container gardening using the e-Bucket system.   Raised beds  utilizing close spacing similar to square foot methods has given gratifying harvest.    Conventional  gardening with chemical fertilizers has  given good results but they all are less than cost effective; I rely on outside sources for fertilizers and soil amendments.

I prefer organic materials to chemical additives but compost has been scarce when I attempted my own and expensive  when  obtained from outside sources.     What is a body to do?

A few chickens offer a source for manure for my compost;  a generous gathering of leaves will supply an abundant  source of carbon for my pile this year.  BUT limited energy  plays havoc  with  plans for larger compost piles.

I am on my way, but spring is fast approaching; my compost pile is slowly doing its thing—I don’t have the stamina to finish it via the 14 day method.

What’s A Body To Do?

Vermicomposting just might  be the answer to my dilemma.  If half the hype is to be believed, I can look forward to some interesting results.worm  bin

Cost wise, after start up, I got it made.

Scraps that I have been wasting will be returned to the earth from which it came.  Why, even junk mail and newspaper waste will be part of my fertilizer cycle, Fetida and Hortense will turn them into that substance that I call the junk when I receive it.

My chicken manure composting process will be speeded up and enhanced with worm poop;  the wigglers will finalize the process with no strenuous effort on my part.

Vermicasting tea promises not only fertilizing properties by insecticidal and fungal control  as well.  Simple to make,  easy to  use; cost effective, too.

MEET MY MIRACLE WORKERS

December 20, 2012 I took the first  step.

The Eisenia fetida, also known as the Tiger worm or Red Wiggler, became a part of my gardening plan when I plopped them into their new home in my computer room.   YEWH!   Guess what?   Two months and 10 pounds of kitchen scrap slurry later, THERE IS NO SMELL !!!    Fetida are slender, short, little squirmier, they are great eaters, but I want some substance in my worms,too.

That’s why I prepared another bin and installed “Hortense” (Eisenia hortensis ) in a new home today.  About the size of a pencil and up to 8 inches long, I figured they should really chow down on the waste I feed them.  Who knows, I might even get  some fisherman interested in using a few.

Vermiculture (worm farming) is going to be an interesting experiment for me this year.   Already I have learned more than I ever knew about vermi poop.

Will  worms prove to be an answer to some of my problems?   We’ll see.

Gone Leaf Crazy

Leaf me no excuses

Raised bed garden from REARHave made halfhearted attempts to use compost over the years but have found the  piles more than I cared to deal with.

I have no doubt of the  benefits, just tend to lose  interest in the building, turning and time involved from garden waste to finished product.

Now, age has created an endurance factor that severely limits my ability to do these things, anyway.

My small property does not generate  enough by-product; I have to purchase nitrogenous materials to add to the small amount of brown waste I do produce; there is no source for animal manures readily available.

Interested in any more excuses for NOT?

Bag them leaves–I will come

After tearing down  two  small piles of waste and actually seeing what could be accomplished, my interest in composting was renewed.  This time I decided there might be a way to compost, even with my limited materials.

Effort number one:  call the city sanitation department  about getting some leaves delivered.    Well, seems that even though we must bag our leaves for street side pickup, delivery to my property was not possible.

The leaf bags are collected by machine and dumped into a garbage type truck which mixes everything into one big glob of mess.   Drats!

The sanitation supervisor suggested:  “Why don’t you  collect the bags ahead of us?”    Bingo!!

Effort number two: Homeowners  spend week ends cleaning leaves  from lawns, bagging them,  placing on the curb for pickup by the city on an irregular basis.   I can get all the leaves I want.A godsend, a common disposal site

Actually, I had done this on a limited basis under cover of darkness, but felt self-conscious.   Being granted permission to pick up another man’s trash,  freed me of guilt..so off I go in the daylight with my little truck.

What luck,  one  neighborhood has chosen a common dump area to place its bags.   Their leaves..my treasure!

Over a two week period I have all the leaves I can use for another year!

Well, actually, I have bags of leaves piled high against my fence.  I have a thick layer of leaves on beds I am determined to reclaim for flowers around my property.

 My problem?  They need shredding!

Effort number  three: Folks, except for shredding with a lawnmower, I have never shredded leaves.  Yep, I have preconceived naive ideas of how simple this is going to be.        Mower does a good job–but I have so many!

Heck, all those commercials make it look so easy using a leaf vac .   I try it.  A real pain in the butt!  Not any faster than the lawnmower–and a lot more work.

If I just had a  shredder chipper–now, surely,  all I have to do is dump ’em in and stand back!

A good friend loaned me a  one of those mini monsters that are suppose to chop 2 inch limbs; boy, I can visualize  my pulverized treasure piling up in front of that thing!

Was I ever educated to the fact that just because  it looks like it SHOULD be easy, it ain’t necessarily!   I have to hand feed this joker through that leaf shoot, one handful at a time!

I  found a  machine  designed as a leaf shredder that seems it would be heavy duty enough for what  I am doing ( leaf feed bin that could  accommodate a bag of leaves each dump)   almost $800 (on sale); I am sticking to  hand feeding that sucker I am using.

I think all this effort will pay

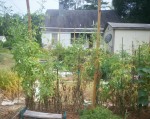
In the first photo you see my raised garden area where I plan to concentrate my efforts this year.     My flower beds will be receiving their share of my collected treasure.Lettuce and Cabbage in raised bed  4-20

 Realistically, greater benefit will come in 2014 when all this will be leaf mold, and real compost from the shredded materials I am preparing in a compost pile.

These leaves, originally destined for the dump, will  give me all the organic matter I didn’ t have before;  add the nitrogen I get from my few chicken’s manure; throw in a few thousand red worms I am feeding in my worm bin—I might ………………………………..dreams keep us alive!!

Worms—they ain’t all bad!

A new “farm” venture.

Going to raise worms.

Now, don’t worry.  I don’t have visions of overnight wealth  promised in some of the old worm farm ads; I don’t  look forward to stabbing some poor squirming creature onto a fishing hook.

My goal — raise plants using that magic potion marketed as worm tea!

First, I got to come up with worm castings; this skinflint is not going to spend ten dollars for a bag of dirt labeled “worm poop”.

No sir, I want to make sure my worm castings are teaming with creatures from that unseen world of  my own vermiculture bin (dig that fancy word for  raising worms).  That means I’ll spend a little more than the minimum to set up my farm.   If it works I got a continuous supply of  worm poop that might be more economical….then again, might not!

The squirm on worms

Let me take my tongue out of my cheek to speak seriously of  these amazing creatures.

Admittedly, I have no experience raising these simple guts of the earth that seem capable of helping me garden more naturally, contribute to a less polluting solution of  waste disposal, and appear to be fun to work with.

One thing is for sure, they will be one conversation starter!   When I, innocently, asked my wife “Can you smell my worms”  I got one  hell of a response.    (I’ll explain that question later).

Research has lead to some interesting discoveries.

Some variety of this seemingly simple form of animal life  is found on nearly every continent.

I want compost, so my interest is the Eisenia fetida, also known as the Tiger worm or Red Wiggler.     If publicity is reliable, I should be able to set up  a small operation to utilize my kitchen waste with relatively little expense or space.   We shall see.

Entering the Worm World

Commercially there are hundreds of dealers willing to sell  fancy bins, but I ain’t buying.      While I hope vermiculture will push me toward a green solution, I am willing to compromise when it comes to bins.    Plastic containers will work  just fine, I read.

Since my computer room will be my farm location, I need:

  • A shallow bin ( six to ten inch depth is ideal).  Needs cover for darkness and to preserve moisture.worm  bin
  • Bedding.    Interestingly seems anything organic can be used.   Plenty of shredded leaves available.
  •  Food.   I got kitchwaste aplenty
  • Worms.  These I will order
  • Understanding wife.   After all, this is her house too.

Ordered and patiently wait for 1000 red wiggler..my stock is on the way!   My farm is about to officially begin operations!

My worms are here!

Will I realize my dreams of   kitchen waste becoming black gold in 4 months? Will there be plenty of worm poop to feed my  plants?  Will my wife  kick  my farm or me out into the cold outside?

I guess that will depend on her reply to my question:   “Can you smell my worms”


Jam – I Did it Myself – Delicious

Preserving food for the winter was a big thing in my youth. The source of every item  used in the process was a  known factor

A big thing  in every sense of the word–long hours  gathering vegetables and fruits, endless time preparing the treasure of  the day, that hot sweaty period around  the  wood burning stove filling  glass mason jars, tending the pressure cooker and the seemly  endless clean up time.   How did they do it?.    Oh, yeah, always BIG batches of everything!

Hard, long, hours of  labor, but oh what satisfaction, gazing at the well stocked pantry shelves, satisfied  the family will eat well this year!

The stock was simple–maybe some salt added to vegetables, enough sugar in jams and jellies to preserve the fruit, little else.

Basic recipes and methods handed down from grandmother to daughter to granddaughter gave assurance the food was safe, sustaining;  friendly competition to be the best cook was  a fair guarantee that simple offerings would be good.

How would others know what the cooking was like?

Back then, if you happened to be visiting, for any reason, at mealtime you were invited to sit!     It was impolite not to offer an invite, and not to accept the invitation.

My guess is that a lot of visits just happen to fall about the traditional eating times!

Times and customs change.

Few people, today, have the vaguest idea about preserving food.

Grocery shelves are packed with thousands of items, each screaming for our attention;  each promising to fill some special need!

Labels, we half trust, outline myriads of ingredients in each can or package, listed according to percentage of volume.

Does it taste good?

I guess so, it’s the only kind I have ever eaten?

Is it good for me?

Probably not,  if  I believe all the studies that are sited yearly  on unsafe  food additives?

Do I care?

Well, yeah, but a guy’s gott’a eat!

What do you expect me to do, produce my own?

What a weird thought!

Which brings me to sharing my experience

Gardening with limited space, harvesting small batches–trying to  overcome the big farm mentality–has proven to be a challenge for me.   Why do small amounts seem insignificant when providing for my feeding needs.   Can not figure that one out, just know it is.

Last year preserving figs  brought me face to face with the reality of storing fruit for later use.   The small batch of jam is delicious, but never ending it seems.  No way, two of us will consume that much sugar laden bread smear!  This year the tree is again overloaded.   Maybe try drying them this go  round.

From a small basket – a year’s worth – strawberry jam

A friend gifted the family with a beautiful basket of strawberries, hand picked from a local farm.

I am diabetic,  so decided to try making  no (or low) sugar  jam.   For comparison made a batch of  ‘Sugarless Strawberry Jam’ and one of ‘Low Sugar Freezer Strawberry Jam’.

From a small basket of strawberries I  made a total of 5 pints + about 8 oz of sample product.    Not bad for what I called a small basket of  fruit.  As much strawberry jam as we will eat for awhile.

Folks, it is delicious!  Can eat the sugarless one like Jello, if I wanted too!     The sugar one is great.  Both taste like fresh strawberries.  They each must be refrigerated or frozen, since there is not enough sugar to act as preservative.

Labor was minimal, cost low, food delicious. satisfaction–priceless!

So, stop saying I can’t!   A small basket of fruit, a minimum amount of sugar–you got a great product–for part of your groceries  you can say  ‘I did it  myself”

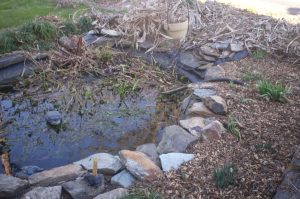
The Reflecting Pool

An oasis of peace and quiet, gently ruffling, yet calm, water

This is no ordinary lined hole in the ground.

For 50+  years it has represented someone’s quest for an oasis of peace and quiet.

The gently ruffling, yet calm, water whispers to the soul: “Be still, listen,let your spirit  be renewed.”

Personally, it  symbolizes a destination, a point in  an unexpected journey begun in 1995.

The world is mine.  Retirement will  give me the time to pursue the quiet activities I have  planned for years;  health can not be better.

My vain delight is in being told I look so much younger than my 65 years.

“Yep! bull you ain’t gonna’ throw me  in eight seconds, I’m ride’n to the finish!”  I yelled as life vaulted from the confines of my  “4:30 am to heavens knows when” days as a restaurant manager to the freedom of  the “what I want, when I want” corral.

One day it all comes to a crashing halt.

To become aware of  obvious mental slow down in disturbing;  slurred speech creates anxiety;  a stumbling shuffle  destroys confidence and strips away any semblance  of dignity.

My son’s term of affection, when  introducing me as “My Old Man”,  brings a wince of pain, as I mentally identify with an old man.

A doctor’s visit and her  diagnoses of type II diabetes lifts a heavy load,  my condition is explainable, and treatable.

My mental capacity seems to be the result  of depression, not diminished cognitive abilities!  There is hope!!

The next three years are hard to explain.   For reasons I still do not understand,  physically, life became more difficult.    Energy become something I remembered, but no longer experienced.    Pain became a constant companion and the ability to complete simple tasks is none existent.

The world outside the confines of home  no longer beckon.   Is  it severe depression?

I deny it with all my being.

Then what happened with the pool?

A leaking plant filled little swamp

I do not know.

When it constantly leaked and could not be repaired, the only recourse seemed to be  let it become a hole in the  ground once more.  That alternative just did not seem reasonable.

Staring into the plant filled, leaking, miniature swamp,  I determined I would try to do it myself.

What is the worse that  can happen?  It will be  a hole in the ground!  Right?

Who knows,  it might be possible to transform it.

Almost finished--the pond reflects prospects for life

Less than two weeks later, there is a functioning pond with new curbing, new plantings in and around it.  With no help I have been able to empty the little swamp, build new shelves, reline, and re-curb the haven for our beloved gold fish.

There is a confident new me!  I have learned I can function;   my  disabilities are ones I have inadvertently imposed on myself.

This oasis of peace and quiet with the  gently ruffling, yet calm, water just outside my kitchen door whispers, …..”come, enjoy life….it is not over.”

Frugal Gardening: Lighted Plant Shelf

I Got The Fever

60 degrees two days in a row,  the sun shining brightly outside  brings this addict face to face with the irresistible  urge to put “just a few seeds” into tiny pots. In a couple weeks these “tiny pots” give way to multiple  larger pots, needing more light–MORE ROOM………….but it is too cold to put them outside.

Yep! I got to get a light shelf!

Never fails!!  Last year I promised myself, never again will I give into the late winter   urge to plant a few seeds in early February.   Spring weather will not settle until late March.   No tomato seeds will be planted till 2nd week in March, at least.

Yeah, right!  LIAR!

Check  catalogs.  Larger grow light units are not an item a frugal gardener (more honestly–a penny pinching old skinflint) is going to plunk down $150 -$600  (not including shipping and handling in many cases) for.

I subscribe to the theory:  economy is the mother of invention; if I want a grow light unit this is certainly going to have to be true.

Judicious shopping and a little time produce:

  • 48″ x 18″ x 64″ high unit with 3 shelves ;each with a  double light shop light fixture); each shelf will accommodate 4 standard 11″ x 22″ trays
  • top storage shelf
  • bottom area with a  covered 36″x21″x20″ high covered storage unit that pulls out serving as a work surface, plus an out of the way 9″x17″ trash can


Plant light advantage– baby plants on part of one shelf

Folks,  floor space less than 2′x4′–  18 square feet of growing space –  all that storage space priced about $200.

Considerable savings compared to commercially available units.     Check it out! 4 shelf unit — 74″x27″x23″ – 2 standard trays per shelf– no storage area.   The price tag–about $500!

My shopping list:

  • 1ea  74″x48″x18″ wire storage shelf unit (rated to support 350lbs/shelf)
  • 3ea  48″ double tube shop lights with reflector hoods  (for T-8 tubes)
  • 6ea  48″ fluorescent T-8  fluorescent tubes
  • 1ea  multiple outlet extension cord
  • 1 ea  indoor light timer single outlet
  • 1 ea 36 x 21 x 20 covered plastic storage container/wheels
  • 1 ea 9″x 17″ plastic trash can
  • 3ea 12″x12″x 8″ plastic pull out storage drawers
  • 1ea  7″ x10″x 8″  plastic 2 drawer storage  unit
  • 1 ea bag of plastic ties

Assembly could not be easier

1.  Remove shelf unit from carton and assemble using 4 of the shelves ( helper simplifies things, but I assembled without help)

Snap the support ring onto each post with top of ring 21″ from floor; slip first shelf onto  the 4 poles locking into position over rings;

Measure upward 16″ from top edge of this shelf locking support ring at 16″mark; Repeat step installing 2 more shelves.  Top shelf will be about 65″ from floor; leaving a space to put storage bins; or a 5th shelf.

2.   Unpack shop light fixtures; hang 1 fixture under each of 3 shelves using hooks and chain provided attaching to center bar of shelf;  make sure cord of each faces the same end of shelves.

For neat appearance pull electrical cord of top unit straight down and fasten to lower cord with a plastic tie, repeat with next 2 cords fastening against shelf with tie so the cords bundle hangs straight.

Use plastic ties to securely attach extension outlet strip to bottom shelf frame.

Plug light fixture cords into outlet extensions;  Extension plugs into the timer, set for 10 hours of light , then plug timer into  wall outlet.

Voila’!  For around $150  a fully functioning plant light unit

To add storage space add a 36″x21″x20 covered plastic wheeled storage container which fits neatly on the floor under first shelf  (easily pulls from under the unit for  use as  flat work surface); a small 9″x17″ trash can goes beside the storage container.  Above top shelf installed 3 plastic 12″x12″ drawer units plus one 2 drawer 7″x10″ unit (all these units are about 9″ high).  Secure  all units to shelf frame with plastic ties.

I will use pots and containers I already own to start garden plants,but should I want covered containers, aluminum roaster baking pans/covers from the grocery store  make excellent inexpensive terrarium type growing units.  They come in all sizes;   side by side 11  3/4″x 9 1/4″x 2 1/2″ roaster pans fit perfectly on 18″ wide shelves of my light unit.

This, of course, adds to cost of the home crafted unit but it is still a HUGE difference compared to commercial units and for my purposes works just a well.

Going Green – No Big Deal

Few of us will disagree with the philosophy– going green will benefit the  world.

We give lip service to the idea, but let us face it,  projects touted to accomplish the feat are  beyond the financial means  ( okay, admit it) or the real interest of the majority.   They are too big.

Quickly the “what would the little I do  help?” attitude sucks us back into our old ways; we forget the whole green  idea.

The problem is we are all victims of the “big is better mindset”.   I have written earlier about how it affects my gardening efforts.  The same disease tends to kill my do-something   desires for making the world a little more safe and naturally productive.

There are many little things that set our paths toward  the new attitude.  Something as simple as toilet tissue can be the start.  Yep!

The simple clear reasoning of  Deloris Steinhouser’s  comment in her family business newsletter (September 2010) made me stop to reevaluate my thinking on going green.  With her permission I share her thoughts.

” I noticed a new brand of toilet paper at my friend’s house.  It’s made by Marcal® and branded Small Steps®.   It is made 100% from recycled materials.  The Marcal website explains the brand name, “Our name is inspired by those small changes that make a big difference.

Changing your paper purchases to the Small Steps® brand of eco-friendly products helps save trees, leaving a greener environment for future generations.”  I was impressed by this name, “Small Steps”.

I am often overwhelmed by today’s green movement.

It seems impossible to be totally green in my daily living, so I feel hypocritical if I do a small green thing, which is dwarfed by all the big non-green things that I do.  But this idea of small steps is compelling.

If we all just take a few small steps, it’s better than no steps at all.  Eventually those small steps will lead to bigger steps, and pretty soon, we’ll be back to where we started 50 years ago, when recycling was the norm, not the exception.

I can’t change all my bad habits overnight, but if I do one thing differently each year, my small steps will start making a difference.  I started composting kitchen scraps this year.”

Right on Deloris!

Frugal Gardener: Drought Takes Its Toll

When I began writing I promised to  share my success and my not so positive experiences.

At the moment, I am in one of those not so positive situations.   We have had no  rain for a while; everything, including me, is withering from heat and lack of moisture.

Actual temperature have been  near, and  over, 100 degrees, with heat index readings to 117 degrees in some areas.   Folks, when the weather man warns the “elderly” to be careful, I ain’t arguing that one!

Its strange, all around us there have been storms, floods, RAIN, but all we have gotten so far are  rumbling thunder concerts.

Take a look at these pictures.   It is hard to believe my garden and plants were pictures of health and bountiful harvest a few short weeks ago.

Fig trees shows need for moisture!

This poor fig tree probably shouts the severity of the situation most clearly.   See the yellowing foliage.  Thankfully, the figs are beginning to ripen; but even the birds are finding it too hot to peck, everything is falling to the ground.

The unusual heat is showing me a couple of interesting things about my methods of planting.

I am using eBuckets, and self watering containers for some of my heirloom tomatoes, and

In eBuckets tomatoes can survive heat, bearly.

close planting in mulched beds for others, to compare methods.

Tomatoes in storage container self-waters hold on

These pictures taken this afternoon (7/27/10) answer some of my  questions .

  • Will tomatoes survive full sun all day when sitting in an exposed 5 gallon eBucket?   Here in SC mine have; even when I have not been able to give them the best of care due to health problems and travel.   They have suffered full day heat, lack of water for several days.  The bottom leaves are dying but the tops are growing (and blooming!).
  • Will a 5 gallon eBucket support growth of an indeterminate tomato? Again, my eBuckets seem to with no problem.   You see stakes in these  buckets, the plants growing around them are over my head and still trying to grow.
  • Tomatoes growing in the self watering containers (converted storage bins), planted 2 plants to the container are doing the same.   Those stakes are 8 ft tall before I pound them into the ground, not very far either!
  • What about the tomatoes I spaced 12 inches apart in a row in the raised bed and mulched?  I had to put 8 ft supports on either end of row to support the growth.

12 inches apart in row, produced abundantly and still growing in heat

You probably wonder what kind of harvest I had. It was fantastic!   June temperatures were comparatively moderate, we had sufficient rain, I was able to give the plants the attention they needed.   My reward was a crop of beautiful tomatoes;  with the heirlooms I finally tasted tomatoes like I remember tomatoes tasting.  Delicious!!

Til the end of June we enjoyed tomatoes, cucumbers, beans, berries, beets….all grown with no spray (no insect damage!)

One tomato has really surprised me, I planted it as a fill-in.  Purchased a couple “Early Girls” figuring they would

Won't give in to heat. Still, growing, blooming and setting fruit!!

produce before the heirloom.   One plant is still growing, blooming and setting fruit!!  It is headed toward the 8 ft mark; so much for the delicate girl!

Do I consider the garden a success at this point?   I certainly do.  My planting methods are proving to be productive, if unorthodox.

My first full season using eBuckets under stressful situations indicates  they can be used successful in less than favorable conditions.

Now, if I can figure out how to make rain, I will have it made.

Read about the Native American rain dance; was planning dance in the front yard until my wife hid my loincloth and informed me that was not the proper attire for that dance anyway!!  DRATS!!

Old Fool!!

Frugal Gardner: The eBucket Is a Winner!

Lianne Meilhac

When the idea of the 5 gallon eBucket began to be developed July 2009, Lianne was one of those who quietly began using the design, on faith–it was new, a lot of people felt it would not  work.    When she posted about her success last fall I was thrilled; when I learned she  had talked her husband into helping build several more this spring I could hardly wait to hear the results.  I asked her to share her impressions after using it; this article is the result of my request.

———————————————————————————————————————


In early 2009, I decided to grow some tomatoes; I was tired of spending a fortune for store-bought tomatoes that tasted like nothing. 

I had no idea I would become obsessed with this new hobby; I think that a lot of “hobby” tomato gardeners would say the same thing!

Because I became obsessed, I got somewhat stressed  when my four plants developed issues over the course of the growing season.  All of them caught some sort of unknown foliage disease; I was never able to determine exactly what it was; I was worried  they would all succumb to it before I could harvest any edible fruit.

I decided to root some cuttings from three of my plants to see if I could manage to salvage the season and make all the work worthwhile.

Fortunately,about the time I was ready to start planting the rooted cuttings, some posts started appearing on the  one of my favorite websites about a new design for self-watering containers.

I was familiar with the commercial SWCs like Earthbox and Tomato Success Kit– they work wonderfully but are costly– at  least $30 or so apiece.

I was  also familiar with a homemade design called an EarthTainer, but for me (and apparently some other people) the cutting and assembling of all of the components seemed a bit daunting.

Some of the “regulars” were speculating as to what materials could be used, someone spoke up, asking about the possibility of using a plastic colander to  create the water reservoir in the bottom of the container.  In response, another poster nicknamed “Gessieviolet ” spoke up to say he would see if he could make it work.

I was looking forward to hearing how his efforts worked out, because if the colander worked it would eliminate  having to fabricate a wicking-chamber, which is usually packed with potting mix and sits in the water, wicking it up into the rest of the mix;   giving the plant a regular, consistent supply of water.

In the proposed design, the colander would sit at the bottom of a 5 gallon bucket with the mix packed tightly around it.  A length of PVC pipe would be placed down through the colander before adding the mix so that the gardener could fill the reservoir from above.

A drinking straw or some plastic tubing would also be placed through a hole drilled in the side of the bucket and into the top of the reservoir area, acting as an overflow conduit and keeping the mix from becoming too saturated and overwatering the plant.

When I learned others had achieved success with his first efforts at this newly designed “EarthBucket” (which would later be shortened to eBucket or EB), I drafted my husband to help me assemble some of them to use for my newly rooted cuttings.

Cuttings in eBucket in 2 months outproduced parent plant growing 5 months

The eBucket went together fairly quickly ; I planted the cuttings into them fairly late in the season;  if I got any fruit  before first frost, I’d be happy.

I was thrilled when those cuttings just “took off” and started setting fruit as soon as they bloomed!

Each of these plants  yielded more tomatoes than each of the parent plants even though they grew  for about two months.  The parents grew and bore for about five months.

None of the fruit from the eBuckets showed  signs of blossom end rot,  a problem with the parent plants.  BER results from several factors, a major one being inconsistent watering.

The fact that none of the plants in the eBuckets showed this was proof to me that the EBs were working exactly as I had hoped they would, providing the plants a consistent and adequate supply of water.

My husband has helped me make several more eBuckets for this season and the plants have done well .

I have learned, however, that they seem to be better long-term for determinate plants, rather than indeterminate

Part of this years crop in eBuckets

ones– the determinate only grow to a certain height (maybe 2 or 3 feet in most cases)

More of this spring's tomatoes in eBuckets

then stop.  The indeterminate ones get much,  much taller over the course of a season;

developing a large root system; I feel  the eBucket  does not have  enough room for those roots.

The eBucket can  be used for other veggies– cucumbers would be good, as would beans, maybe even corn.

Others are  trying other veggies with apparent success,  I eagerly await their  input  so I’ll know what veggies to plant in the eBuckets next year!